While she was still pregnant but after they learned the sex of the baby, my sister and I went fabric shopping. The goal to pick fabrics that would make up her quilt.
Having made the quilt for her older daughter Vespa, I felt it was important I also make one for her second daughter. We had a good time picking out the fabrics. That was about a year ago now. Last fall a serious mishap with my sewing machine caused a very bad bobbin tangle where I nearly lost two of the fabrics. Happily I was able to get out the tangle with no ill damage to fabric. Since the bobbin case got mangled, that was the last time I sewed.
Fast forward to this year’s late spring. I was feeling quite guilty for not having this quilt to my sister sooner. Now Inara is 7 months old and her quilt was still pieces in a project bag. I took my machine in for repairs, while at the shop they told me about this other machine used as a trade in just the day before. It’s well kept, has some nice extras and the model below one owned by my friend. After researching and asking questions I decided to get it. With new-to-me machine in hand it was time to get working.
The quilt I made is from Cluck Cluck Sew. I found it via Pinterest when I clicked to see the site, I was taken to buttons quilts, a quilts blogger. There I found the link to a tutorial from Cluck Cluck Sew. Originally published online July 2012, her Strip and Flip Baby Quilt was just the sort of thing I was looking for. It was simple, directions looked well done and it looked great.
My sister had a hard time picking out fabrics and we had – let me rephrase, in fact she picked out a ton, trouble came when we started putting them together. She just wasn’t happy with some of the combinations, felt the colors were just off from each other, etc. If she or her husband didn’t like something, it was tossed out. In the end we had 10 different fabric choices. One of those also featured in full as the back. 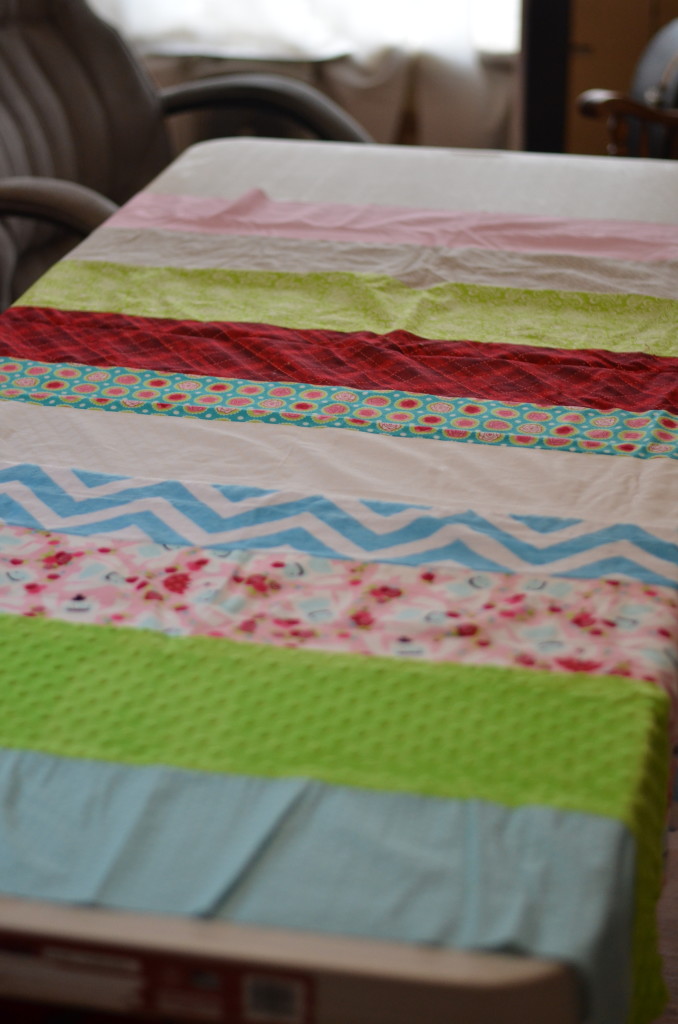
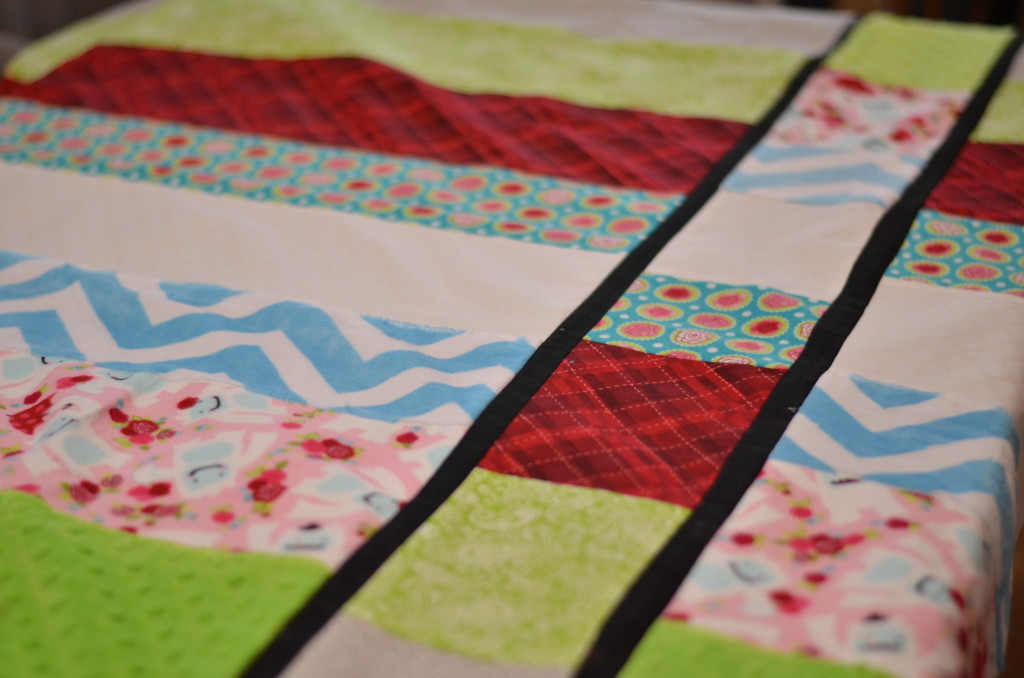
Since I made my version with 10 strips, they had to be much wider stripes ranging about 5 to 6 inches each. The fabrics are cotton or flannel, with the exception of two, raised bumps and blue/white chevron.
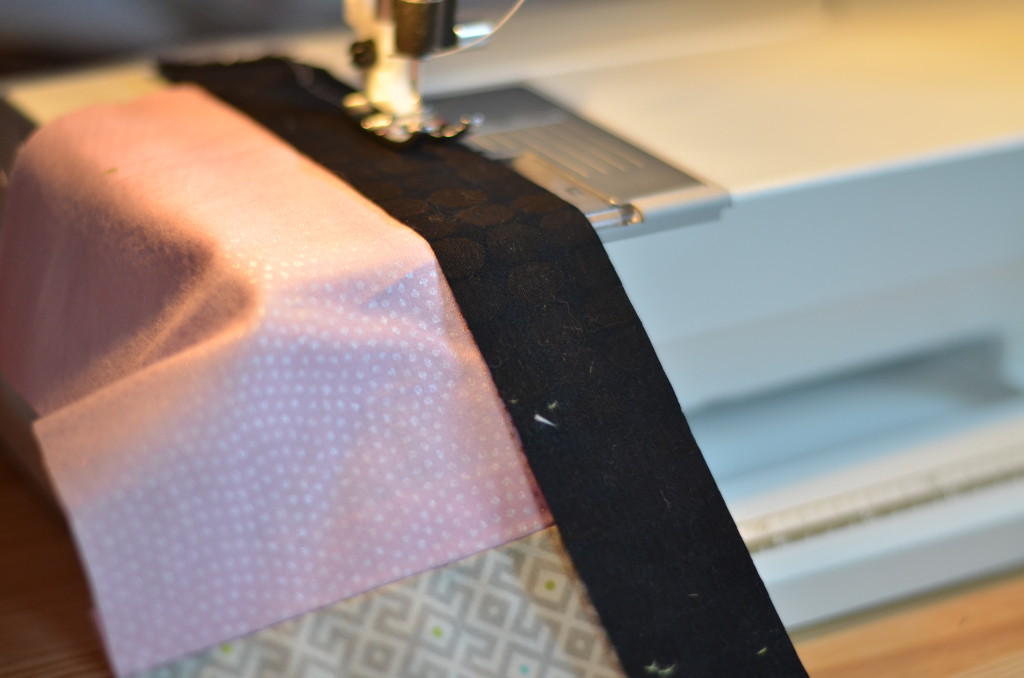
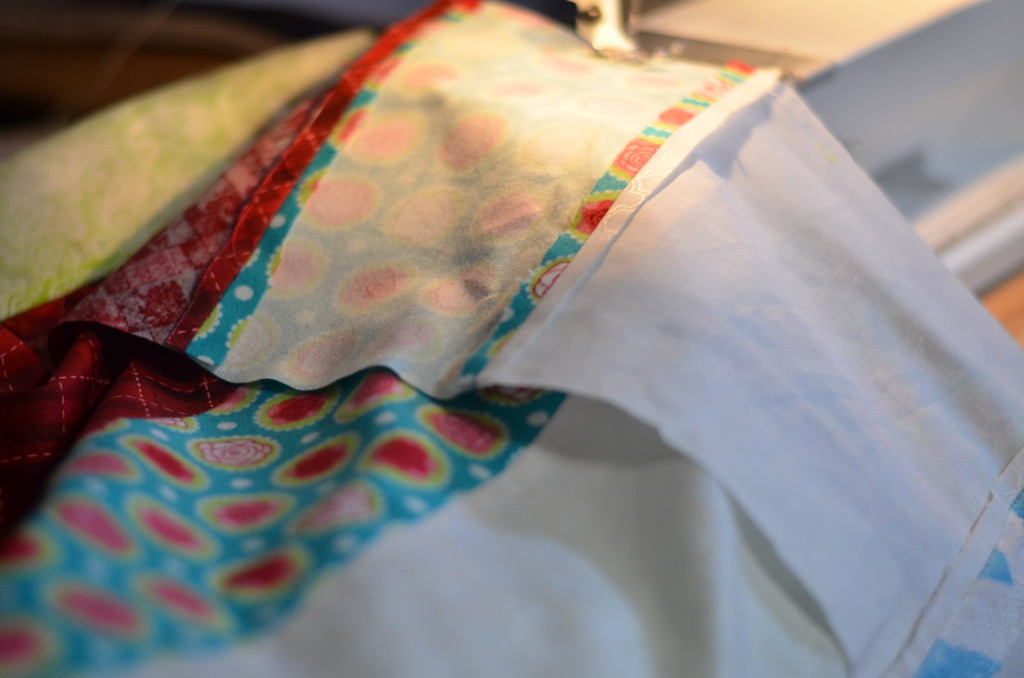 I had an easy time squaring up the quilt, cutting the mid-strip out and adding the black border on it. Everything went smoothly when I put the 3 sections back together. As you might expect the two stretch minky fabrics did put up some resistance. I did my best to be careful of that but I still ended up with the strips being off slightly.
 The above photo has the 3 sections freshly put back together. You can see how the fabrics slide just slightly here.
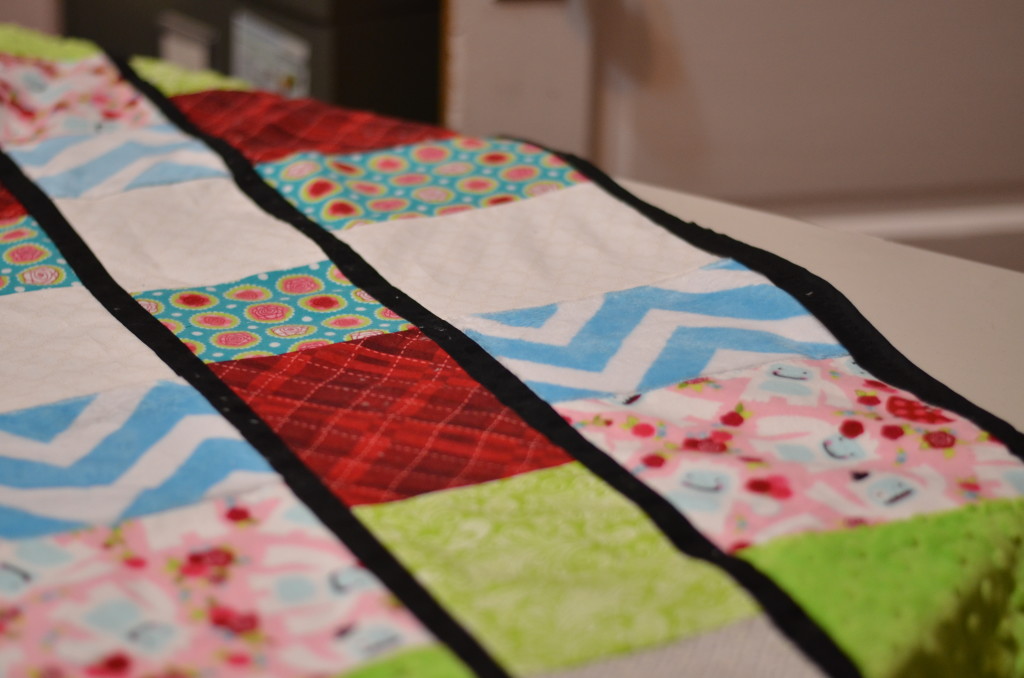 Back fabric and binding put on. The back is also the blue and white chevron fabric.
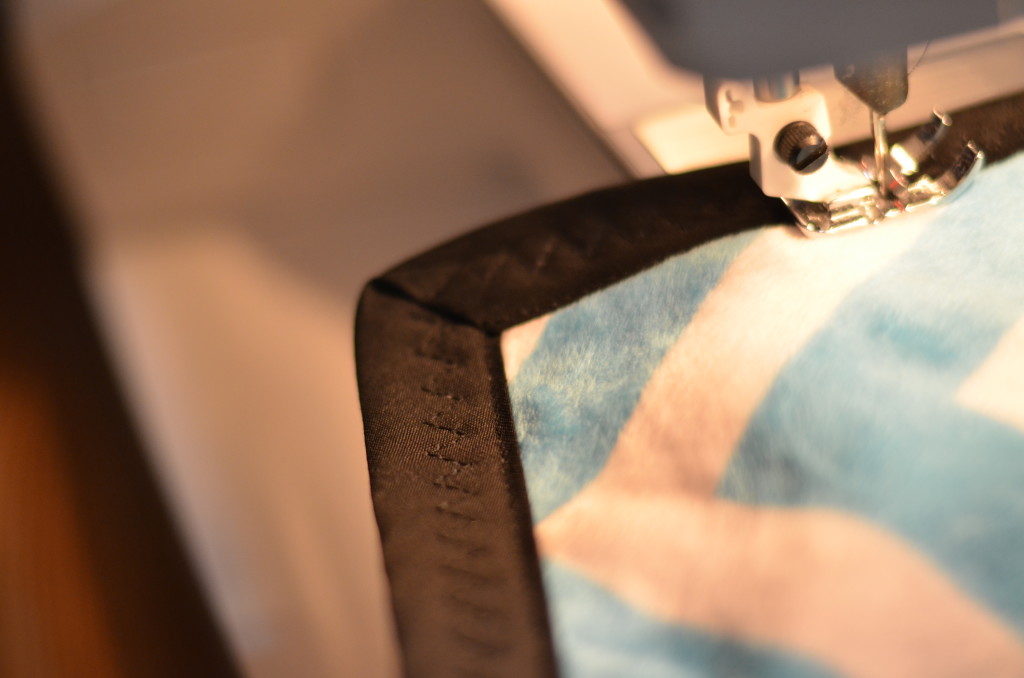
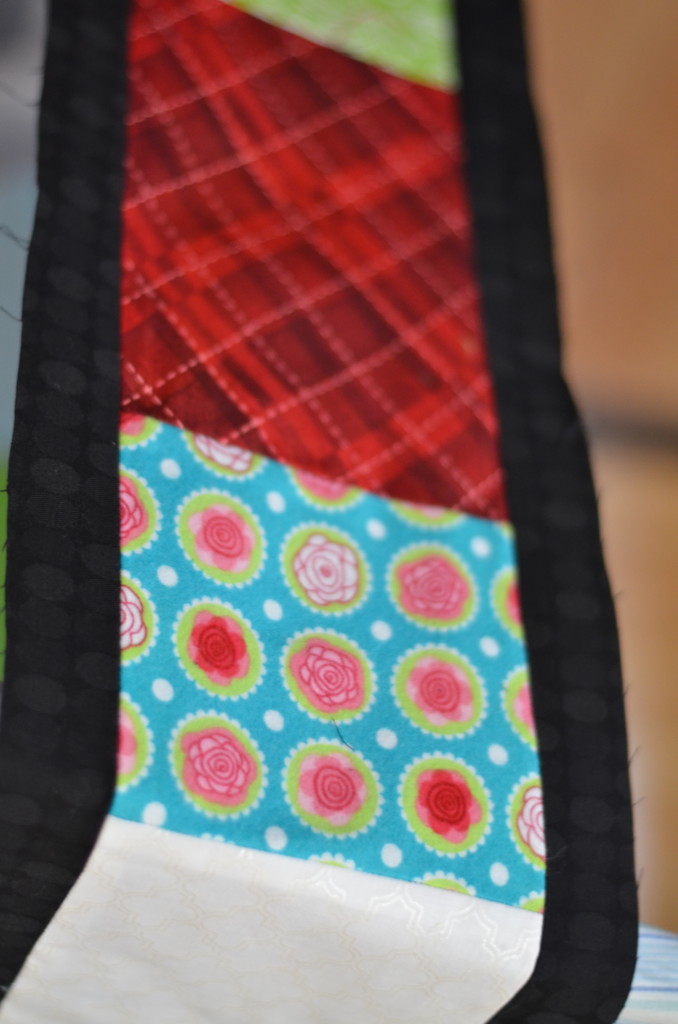
On the binding I did a zig zag, followed by top stitch. It was slow and seems excessive, but I felt the two together gave a better look than just the zig zag alone. You can almost see it in the blanket corner. Also, I think it will help the blanket to last longer, it is going to baby.
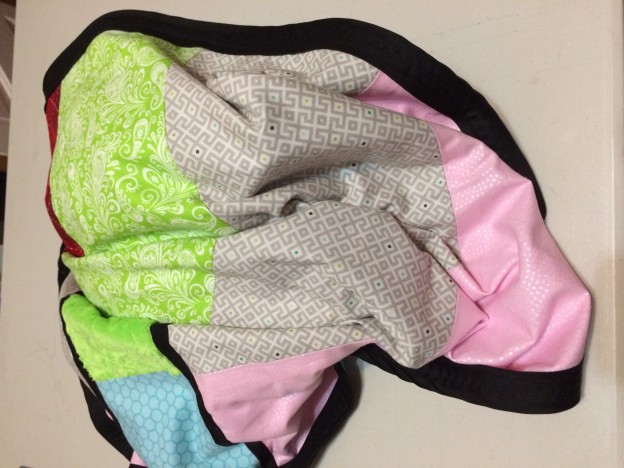
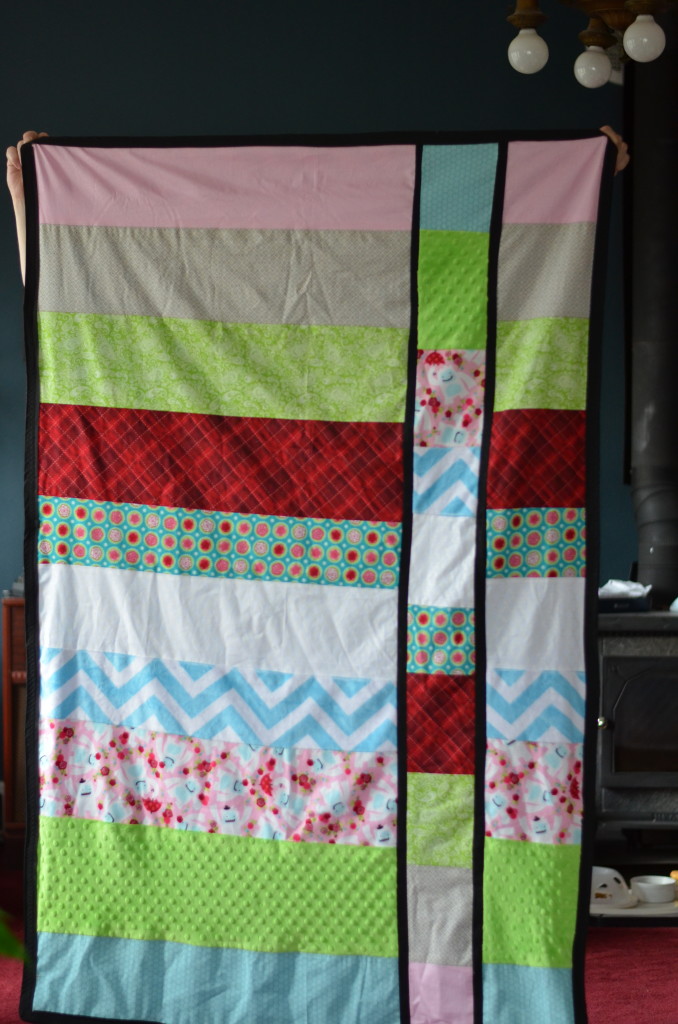 The final piece! The fabrics look great together and it measures at size larger than I expected. I know I previously said I used 10 fabrics about 5 inches wide, however I didn’t math out for the final piece. 😛
Final impression and thoughts; It has quirks but I’m really pleased with how it looks. I’m sure my niece is going to like it. I just hope her sister doesn’t steal it.
You must be logged in to post a comment.