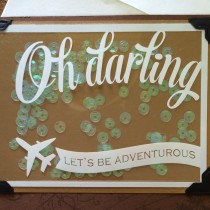
Having just learned a new multi-media technique from my friend Grace, I decided to put my new found skills to the test by making luggage tags to include with the wedding card for my brother-in-law and his wife.
I had fun making these. The tags I picked up as countertop samples from Home Depot. There’s lots of chose from and they come in two sizes. Each one is a tag as they are displayed on pegs for people to take home and compare.
For their tags I chose to use a light piece on the front, to keep their names readable. I used my StazOn black ink for the names and clear embossing powder for the dandelion. I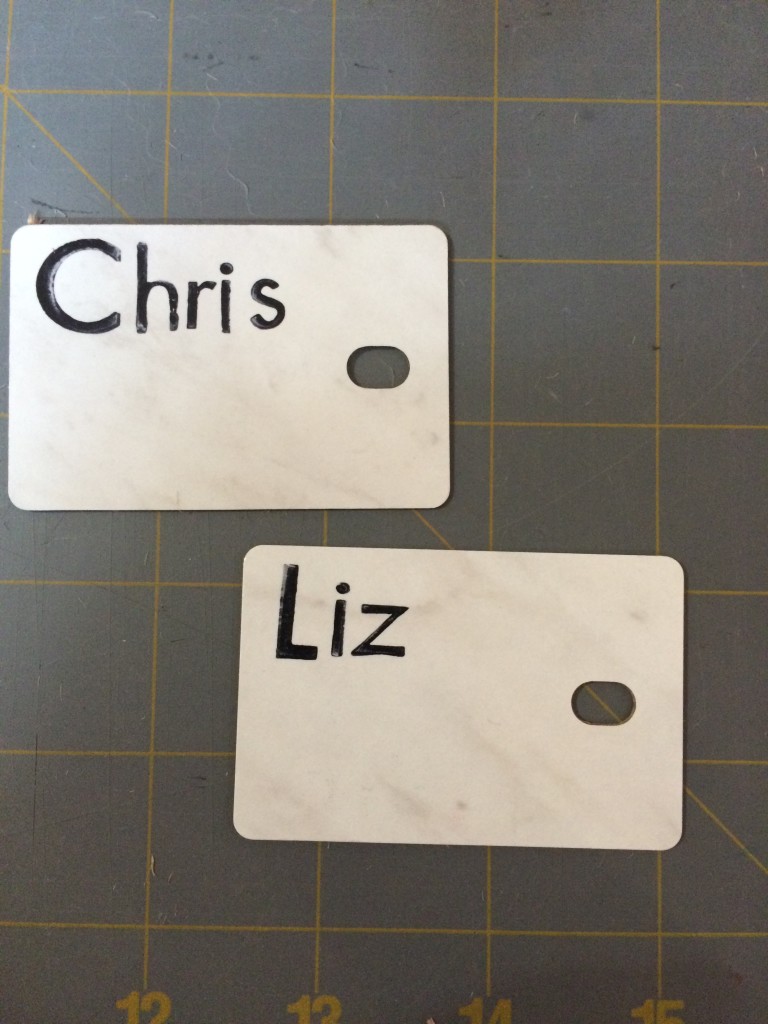 t’s hard to see in the photo, but trust me, it’s there. I was unable to get a clear photo where it could be seen. To be sure that the names wouldn’t rub off, I allowed them to dry overnight. Knowing they are traveling around Southeast Asia, I wanted to make sure they could withstand water/humid climates.
For the back, I reached for my burlap paper stack. I traced the tag out on it and cut away. The hardest part was rounding the corners. Burlap is quite fibrous so I had little bits all over my table from the cutting. Again, with StazOn ink I stamped the swirl. With a piece of astatate film(you could also use overhead projector film), I stamped the date one. That is adhered with some glue and a brad. As for the metal tag, I not only glued it but also sewed it on. The idea worked pretty well. To make sure the thread doesn’t come lose I used hot glue on the backside. 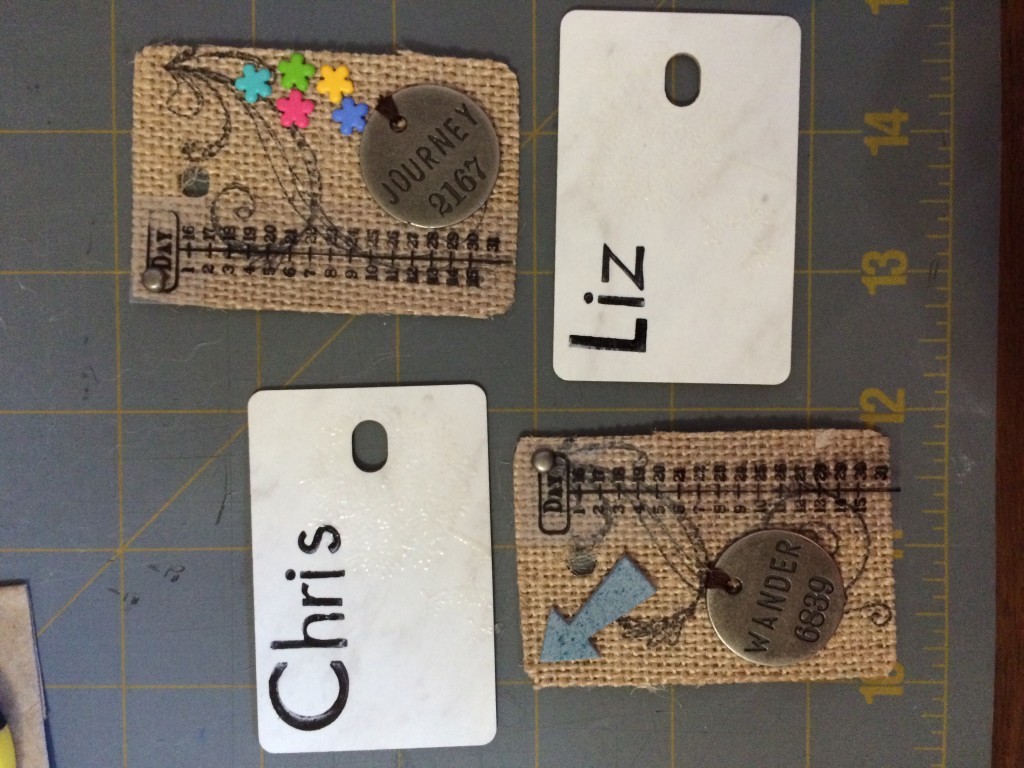 In the case of Liz’s tag, the colored flowers are actually brads. The hardest part of those was getting them in the right place! I didn’t think that was going to be a challenge but I was wrong. As far Chris’s, the arrow is a grungeboard. If you have never used it, I would recommend it. It is wonderfully flexible, very durable and easy to work with. I believe it is a Ranger product and offered in the Tim Holtz line. I just glued that piece on.
 When it came to final assembly, I used a lot of glue. Both hot glue and this epoxy type one I have. The epoxy type actually holds the two sides together. I allowed it to dry overnight. The next day I went back and tested the bond adding more where it might be loose. The side edges looked very raw and needed something to cover them. A thin piece of ribbon seemed to look the best, although I would have loved a small rope look. I used the hot glue to put that on. I have a low temp, really cheap on so it was slow going. In efforts to make them more water resistant, I sprayed some coats of polyurethane on each side. I believe each has two coats, but it could be more.
Overall, they turned out alright. In reflection I might have been asking too much of them when I added so many elements on. Either way, I really enjoyed making them and it was a fun challenge.
You must be logged in to post a comment.